How to Migrate Swagger Data to EchoAPI?

Swagger is a reliable tool for writing API documentation, but its reliance on annotations and lack of permission control can hinder work efficiency. As a developer, creating API documentation is routine. For years, Swagger has been my default tool for this, but despite its powerful features, I've often found its dependence on annotations and lack of permission controls to be productivity-stifling. Fortunately, in 2024, I discovered EchoAPI, a tool that perfectly addresses these shortcomings of Swagger.
What is Swagger?
Swagger, also known as the OpenAPI Specification, is an open-source framework that simplifies the process of designing, documenting, and testing RESTful APIs. It provides a standardized and machine-readable way to describe the structure and functionality of an API, including details about endpoints, request and response formats, parameters, authentication methods, and more.
This documentation is written in JSON or YAML format and serves as a contract between API producers and consumers, ensuring that both parties have a clear understanding of how the API should behave. Swagger promotes consistency and collaboration in API development by offering a single source of truth that can be easily shared with developers, testers, and other stakeholders.
Features of Swagger
Swagger’s rich set of features simplifies API development and testing, making it an essential tool in the modern software development toolkit. Here are the top 5 features that make Swagger indispensable in the world of API development:
1. Comprehensive API Documentation: Swagger provides a structured and machine-readable way to describe APIs, offering a single source of truth for developers to understand API endpoints, request/response formats, authentication methods, and more.
2. Interactive Swagger UI: One of Swagger’s standout features is the interactive Swagger UI, which automatically generates user-friendly web-based documentation from the API specification.
3. Code Generation: Swagger supports automatic code generation, allowing developers to create client SDKs and server stubs in multiple programming languages.
4. API Versioning and Management: It facilitates API versioning, helping teams manage different iterations of APIs and maintain backward compatibility.
5. Validation and Testing: Swagger enables automated validation of API requests and responses, enhancing the reliability of API endpoints.
The Struggles with Swagger
Swagger is a reliable tool for API documentation, but despite its rich features, the user experience is not perfect. Its reliance on annotations and lack of permission control can hinder productivity. Here are the common frustrations I've encountered while using Swagger:
1. Learning Curve:
Creating and maintaining Swagger documentation may have a steep learning curve, especially for those new to the OpenAPI Specification.
2. Complexity for Simple APIs
For very simple APIs, using Swagger might introduce unnecessary complexity due to its comprehensive approach.
3. Initial Setup Time
Setting up Swagger documentation for an existing API can be time-consuming, particularly if the API lacks structured documentation.
4. Maintenance Overhead
Keeping Swagger documentation up-to-date can be challenging, and outdated documentation can lead to confusion and errors.
5. Limited Support for Non-REST APIs
Swagger is primarily designed for RESTful APIs, and adapting it to non-RESTful APIs may require workarounds.
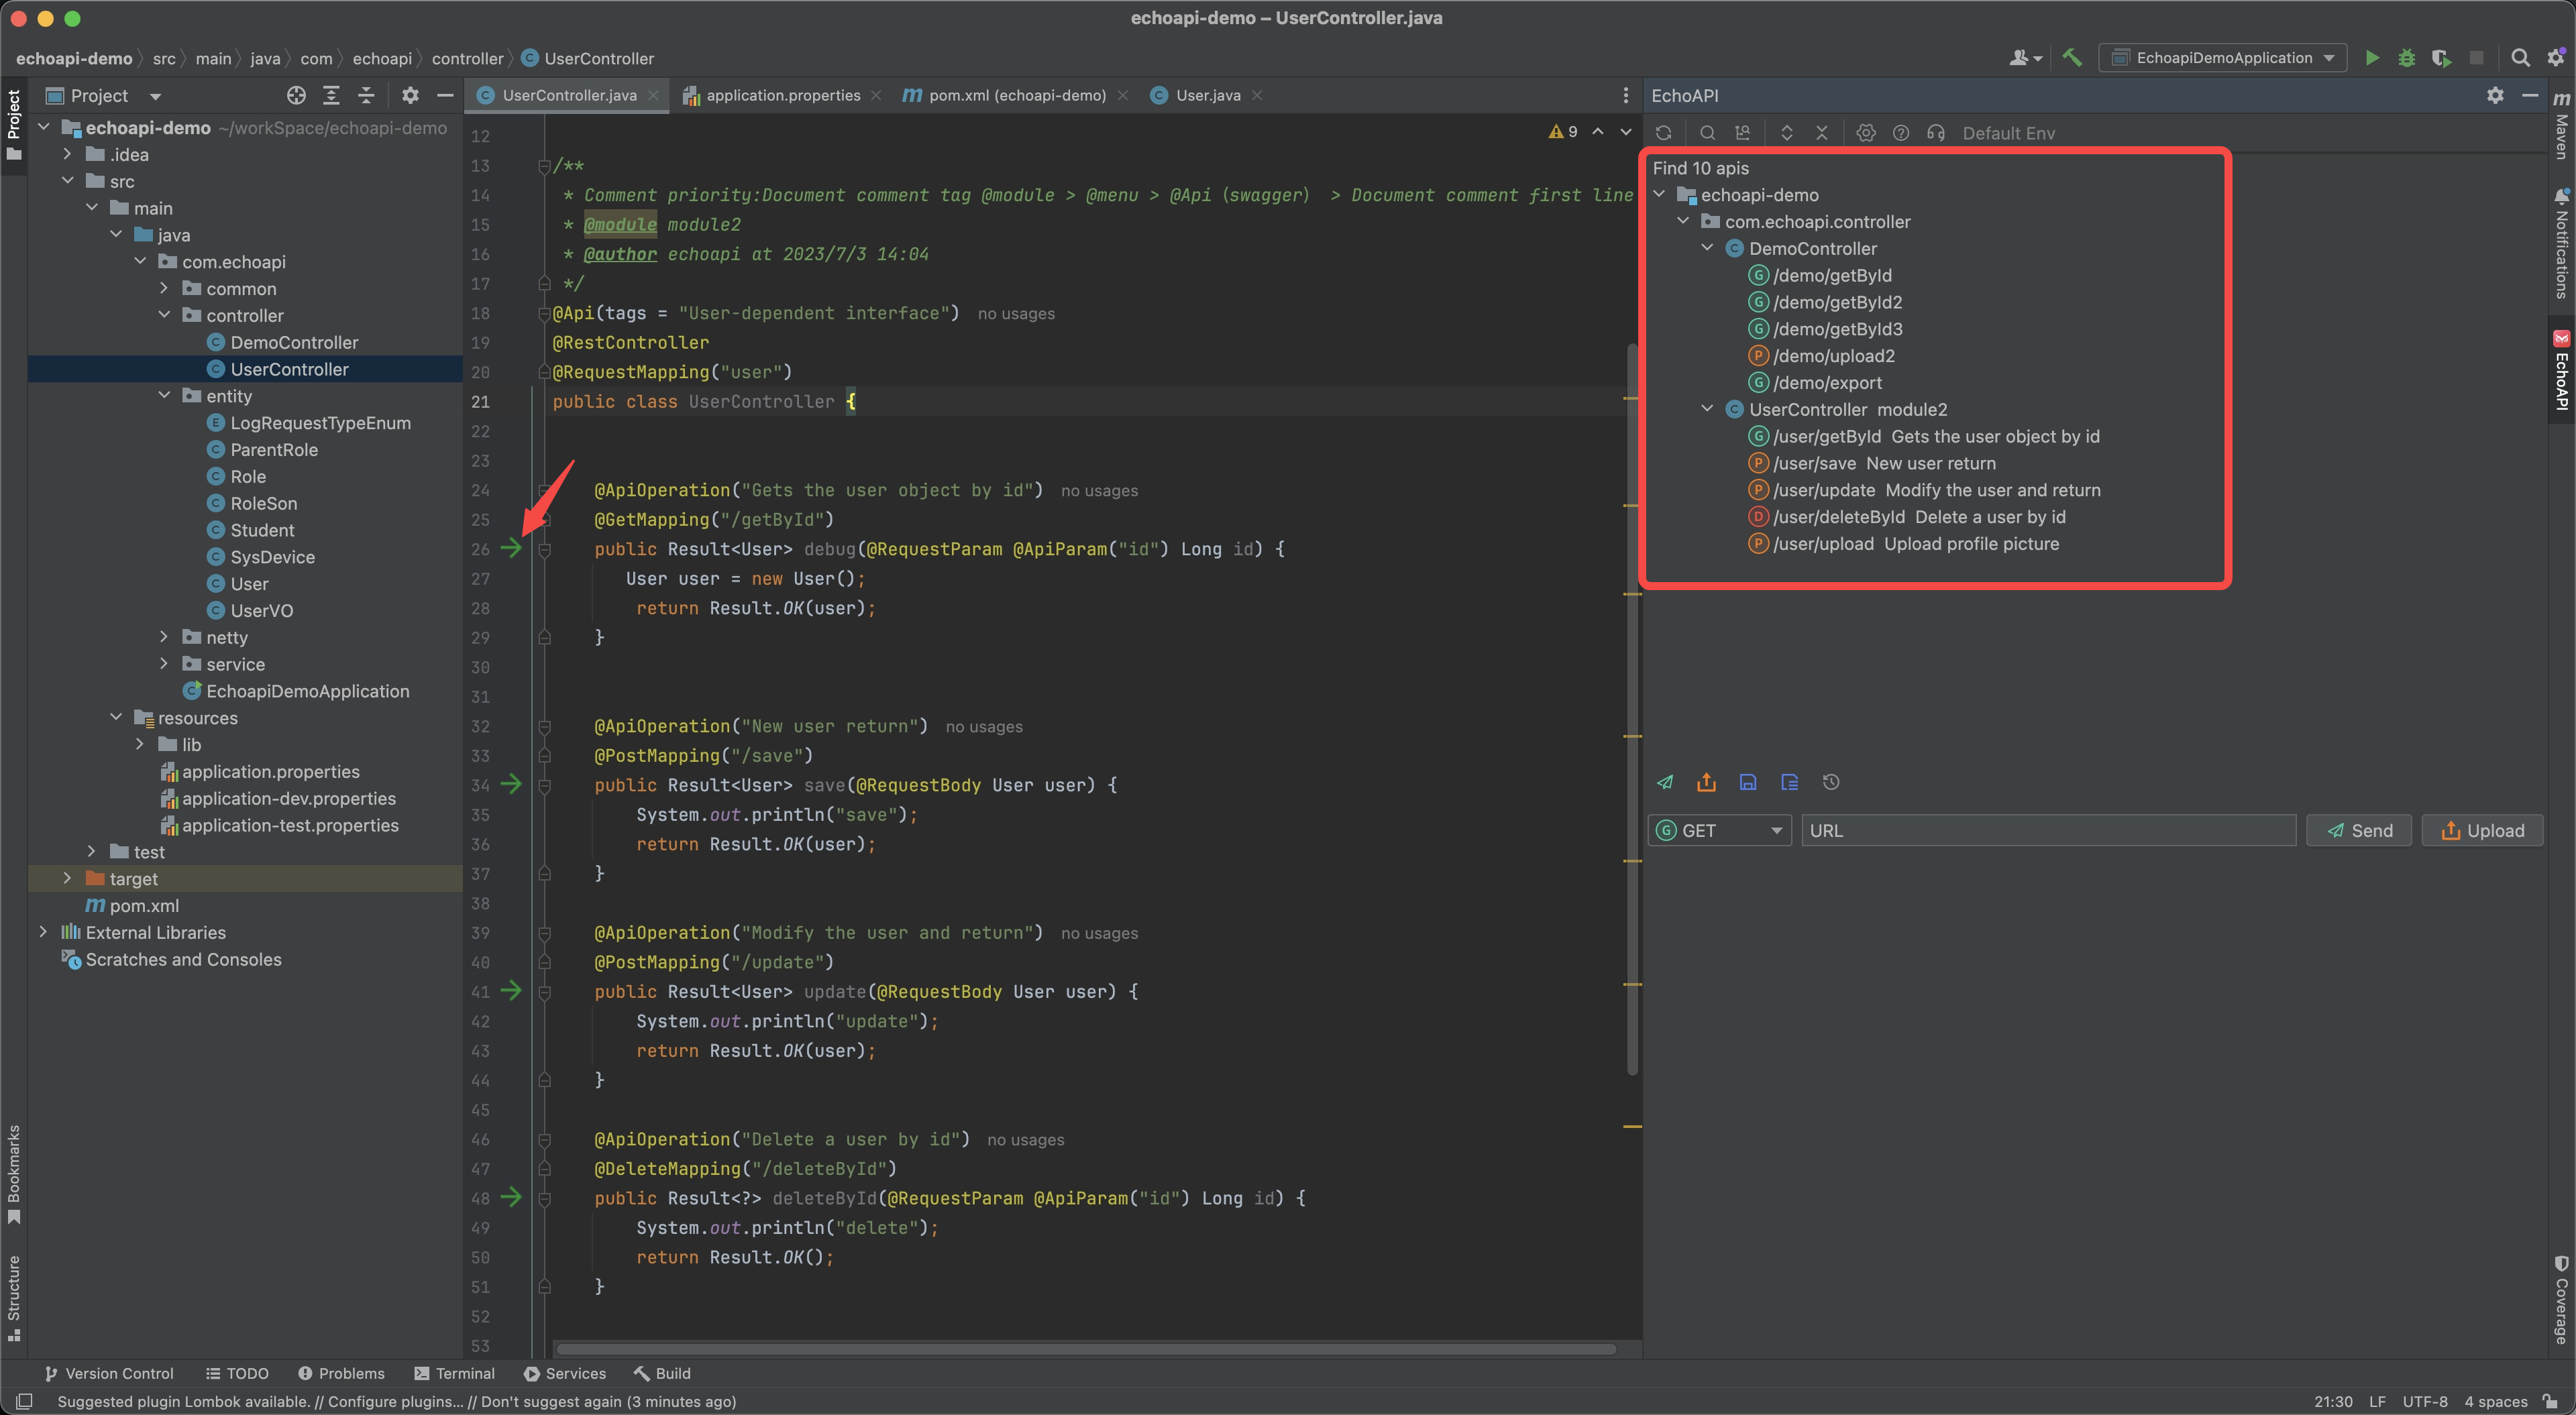
6. Tedious Swagger Annotations
Incorporating Swagger into a project demands writing numerous annotations, which significantly increases my workload and annoyance. To illustrate this, consider the following example:
@Api(tags = "User-dependent interface")
@RestController
@RequestMapping("user")
public class UserController {

    @ApiOperation("Gets the user object by id")
    @GetMapping("/getById")
    public Result<User> debug(Long id) {
        User user = new User();
        return Result.OK(user);
    }

    @ApiOperation("New user return")
    @PostMapping("/save")
    public Result<User> save(@RequestBody User user) {
        return Result.OK(user);
    }

    @ApiOperation("Modify the user and return")
    @PostMapping("/update")
    public Result<User> update(@RequestBody User user) {
        return Result.OK(user);
    }

    @ApiOperation("Delete a user by id")
    @DeleteMapping("/deleteById")
    public Result<?> deleteById(@RequestParam @ApiParam("id") Long id) {
        return Result.OK();
    }
}
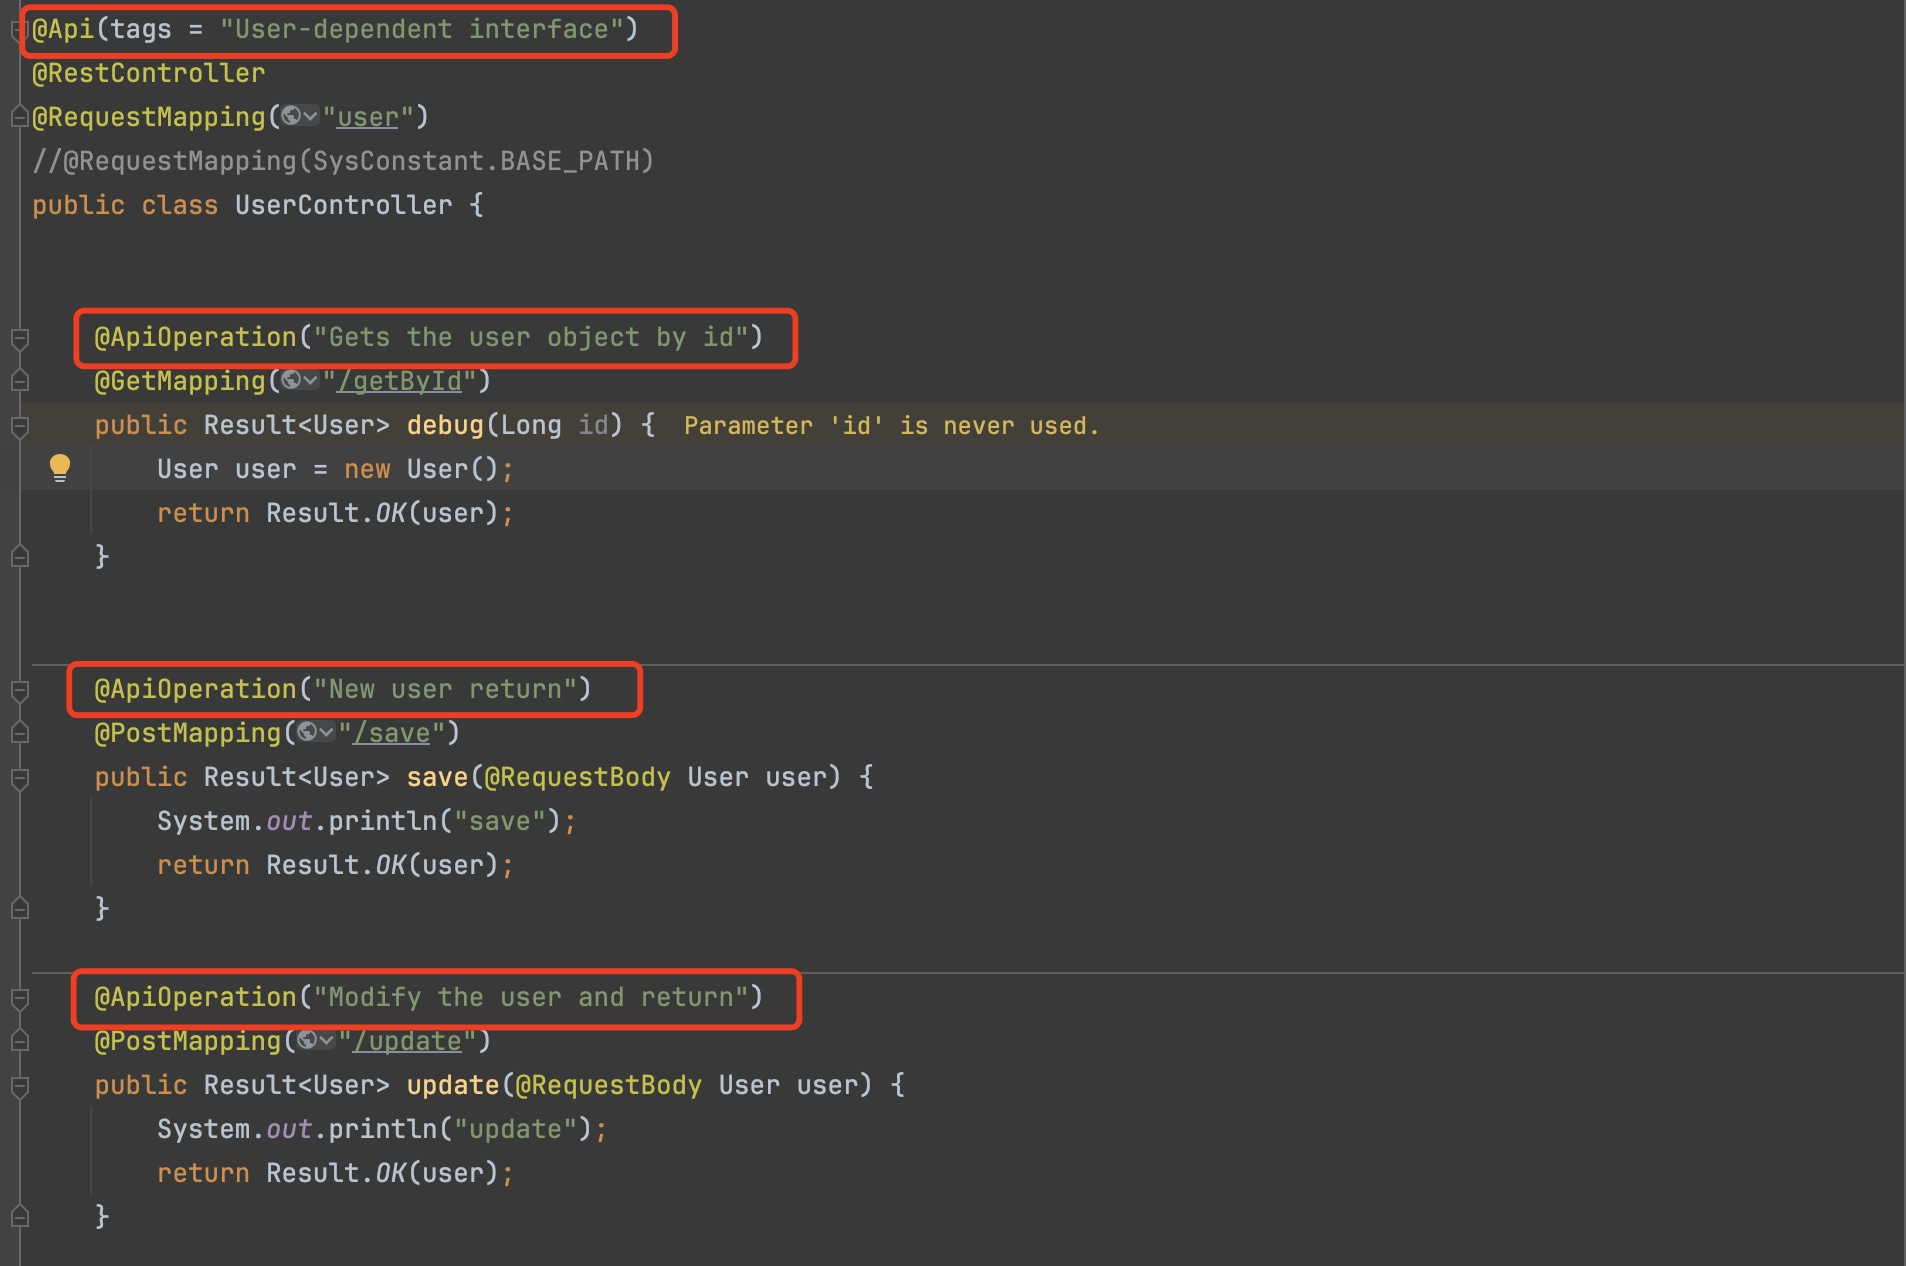
Having to manually add annotations for every endpoint clutters the code and makes it harder to maintain.
7. Lack of Permission Configuration
Swagger lacks built-in permission configuration, meaning you can't restrict access to certain API documentation. This is particularly problematic when you need to document sensitive or proprietary APIs without exposing them to everyon

e.
After wrestling with Swagger’s UI for far too long, I started exploring alternatives. That’s when I discovered EchoAPI, a tool that completely transformed my API documentation workflow.
What is EchoAPI
EchoAPI is an ultra-lightweight collaboration tool for API development, offering features like API design, debugging, automated testing, and load testing. Plus, it comes with plugins for IntelliJ IDEA(EchoAPI for IntelliJ IDEA), extension for VS Code(EchoAPI for VS Code), extension for Cursor(EchoAPI for Cursor), and a Chrome request capture extension(EchoAPI Interceptor), all without the need to log in.
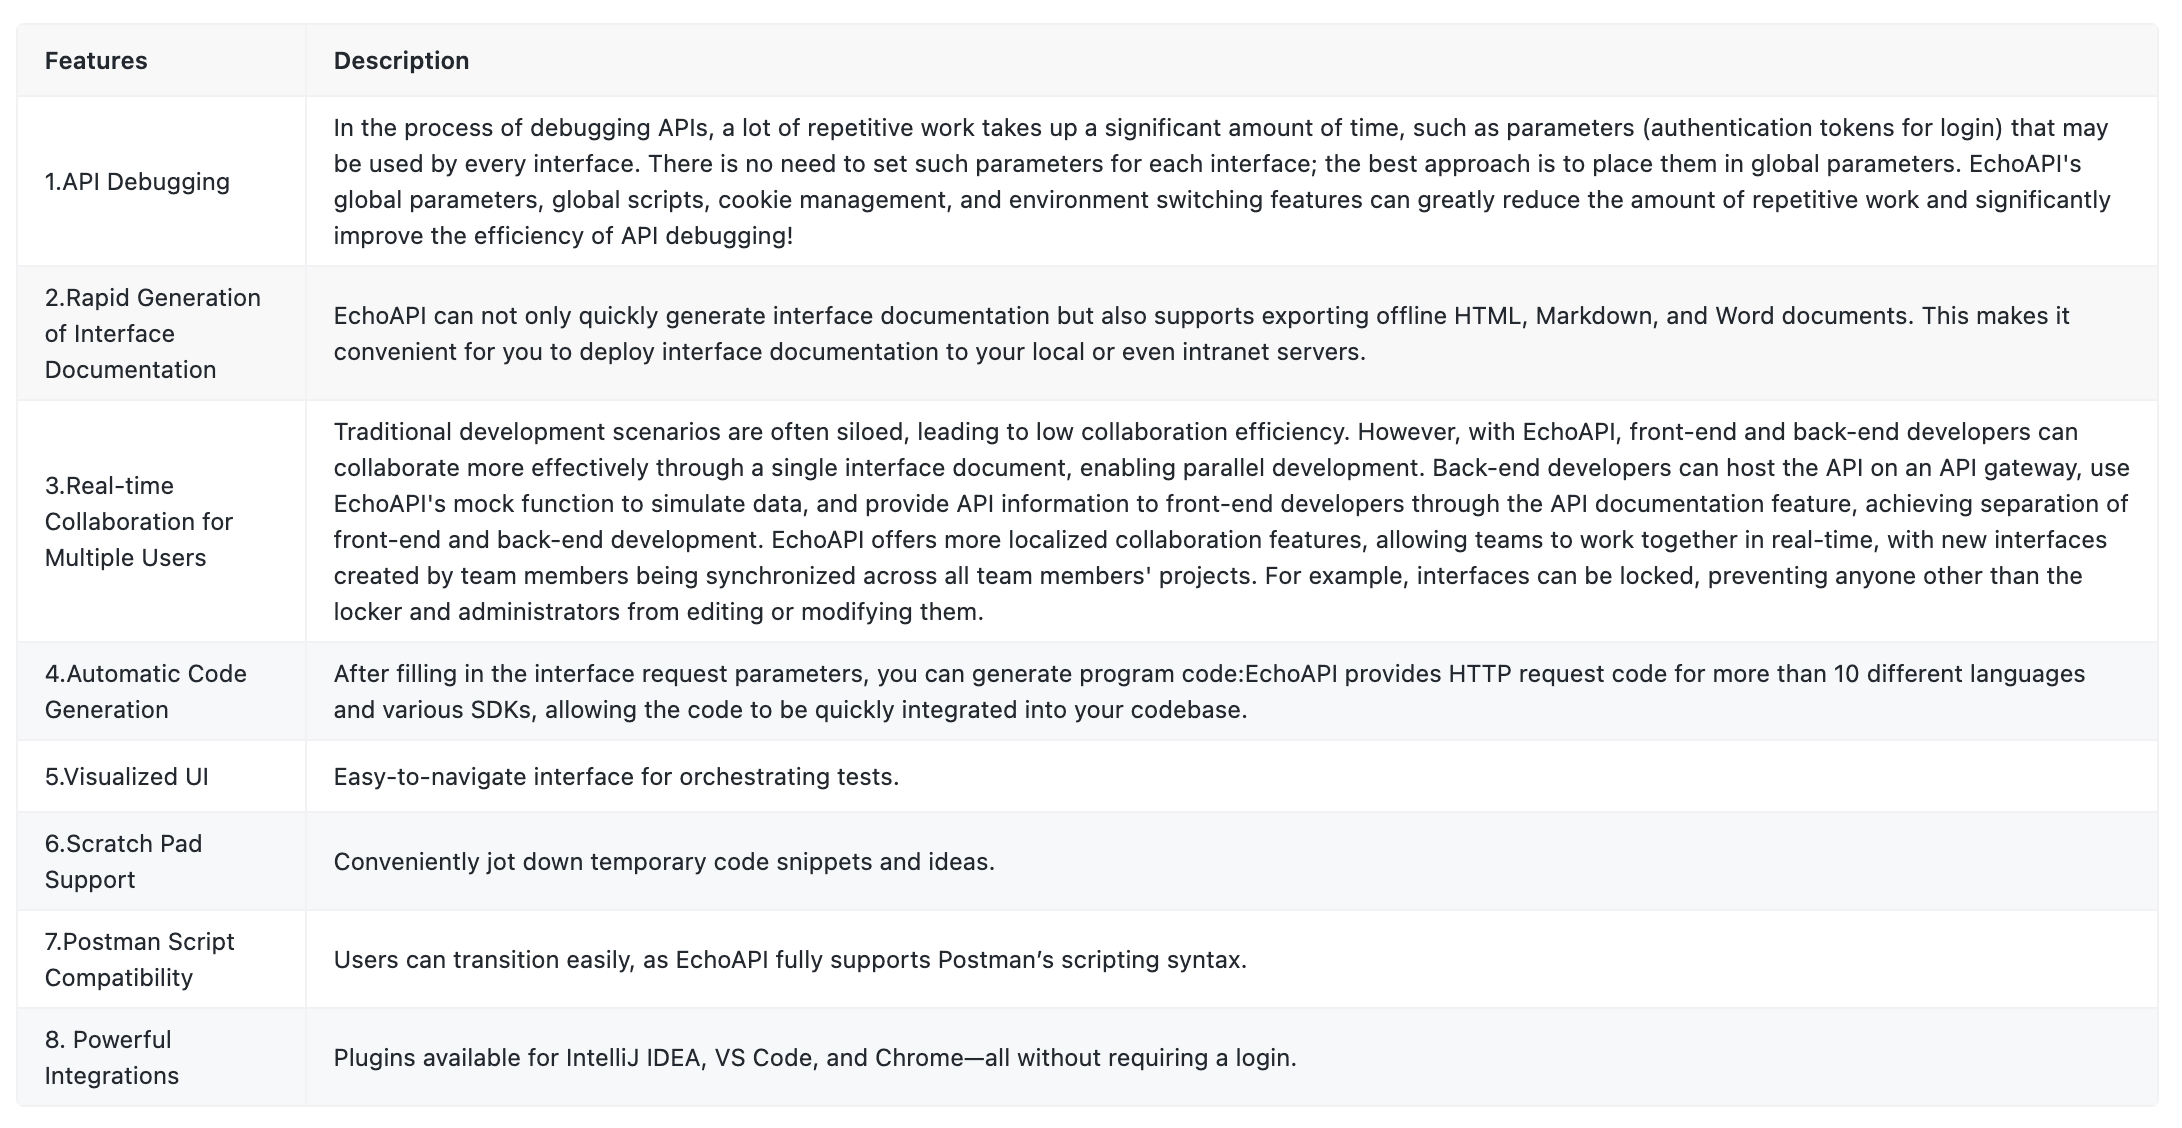
Features of EchoAPI:
How to Migrate Swagger Data to EchoAPI
Method One: Exporting Swagger Files and Importing
This is the most direct method, suitable for one-time migration, especially when your API documentation is relatively stable. Here are the specific steps:
Export Swagger Files
First, in the Swagger UI, export the API documentation as a .yaml or .json file. Usually, you can find the source file in the top left corner of the Swagger UI interface and then download it.
If the interface does not display a URL link, you can press 'F12' or 'Ctrl+Shift+I' to open the browser console, then navigate to 'Network -> Fetch/XHR' and refresh the entire page. A .json file will appear, which you can open in a new window and download.
Import to EchoAPI
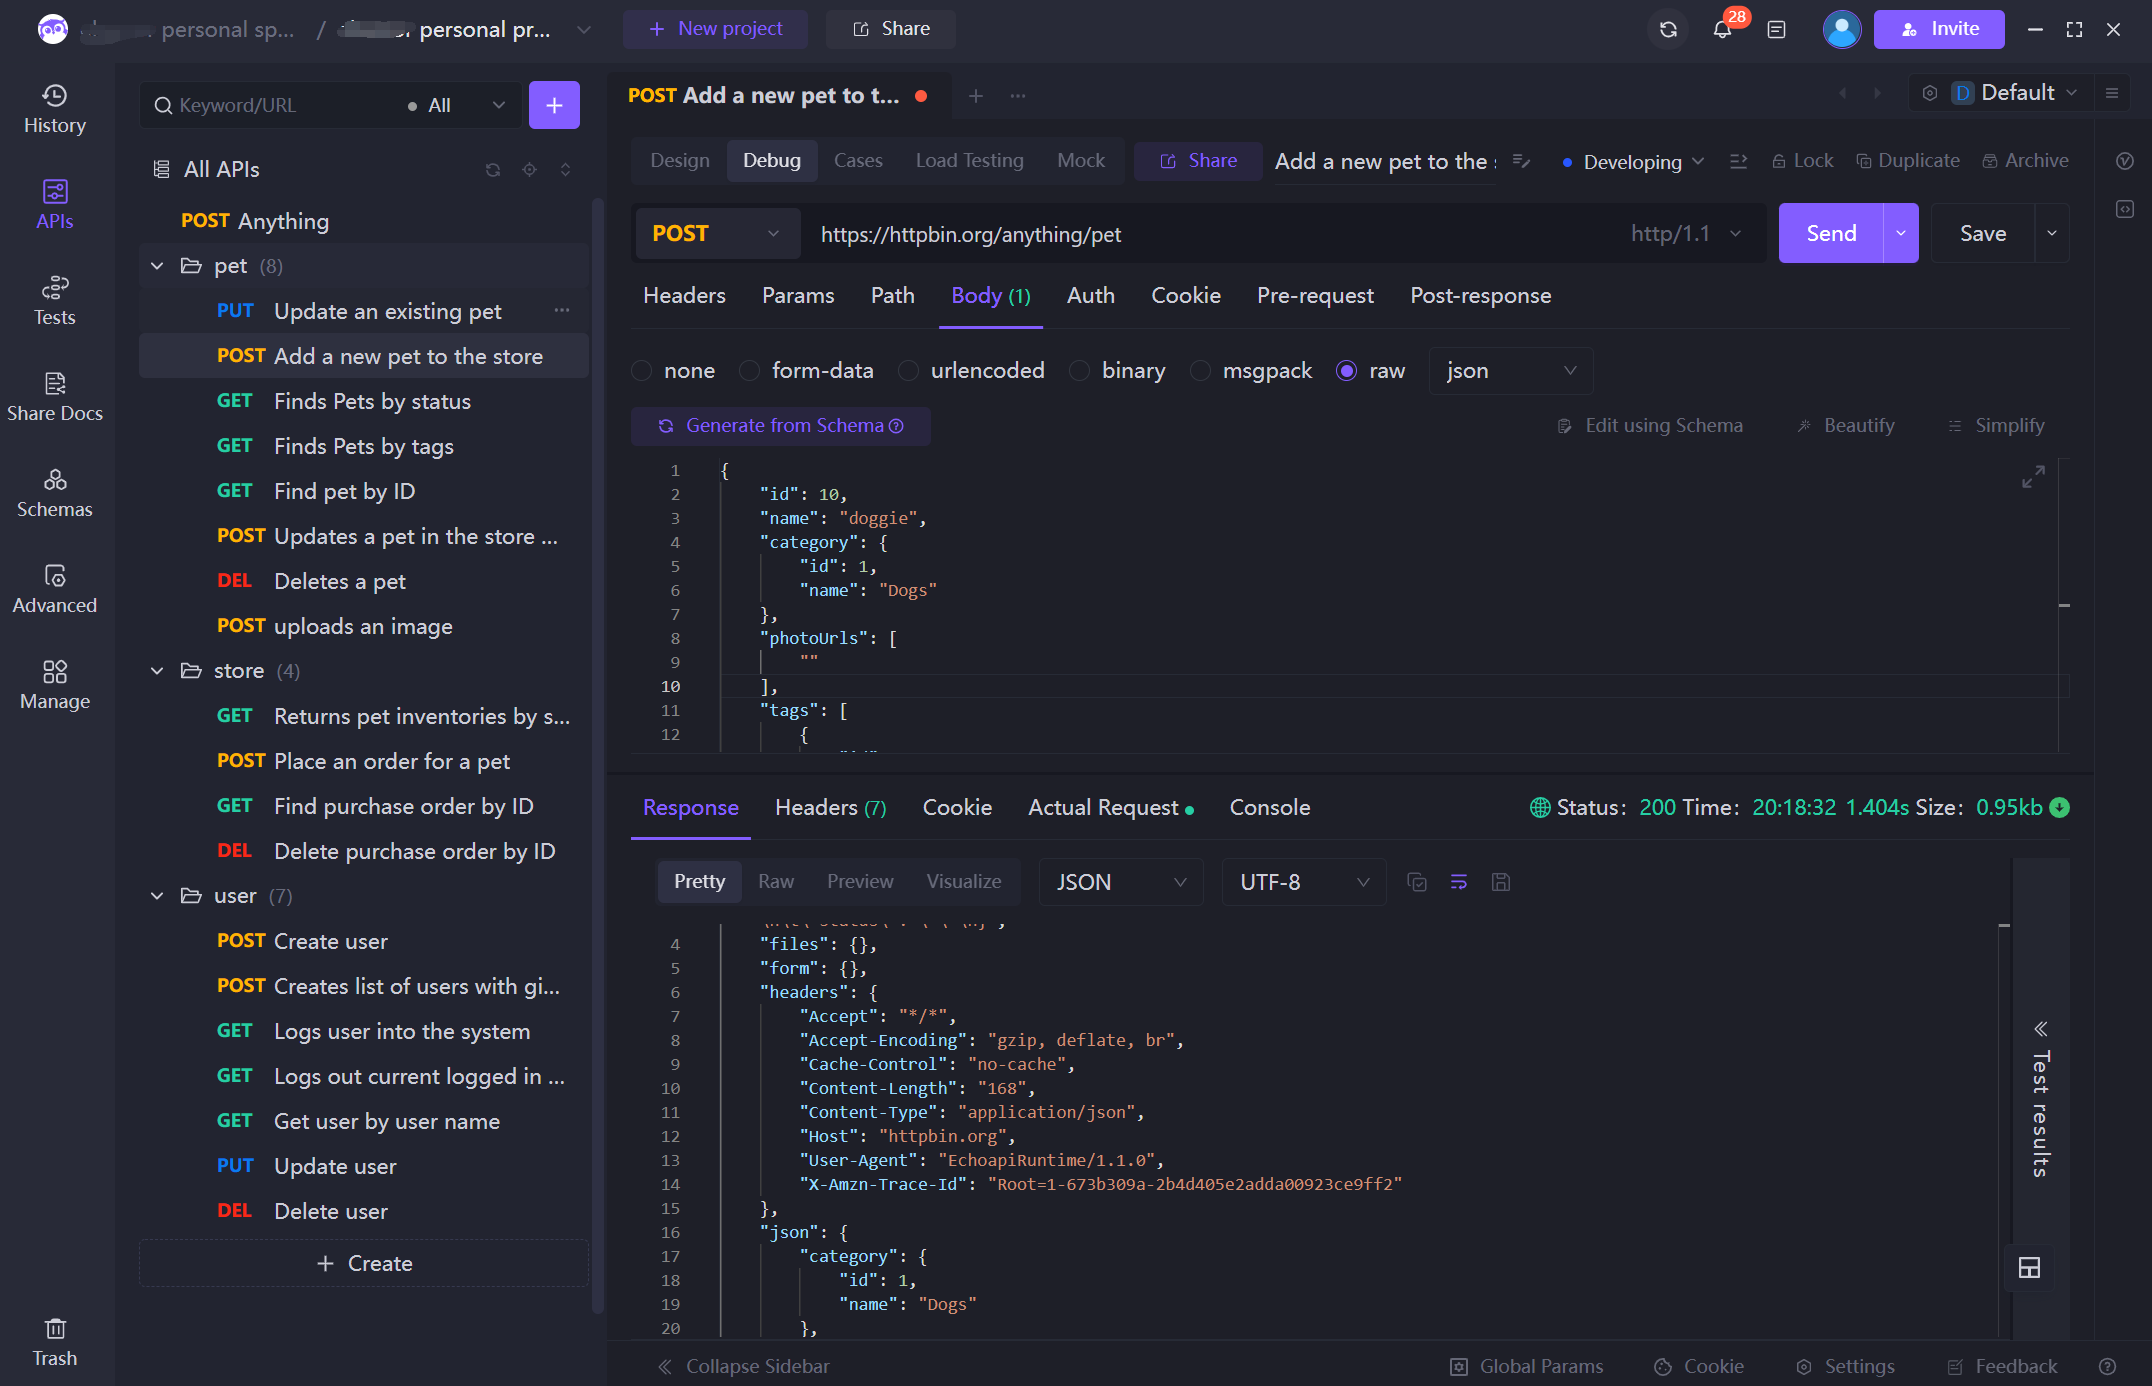
Open EchoAPI, enter the project, and successively select 'Advanced -> Import Data -> Swagger', and upload the previously exported file. If there is a source file URL that is accessible over the public network.
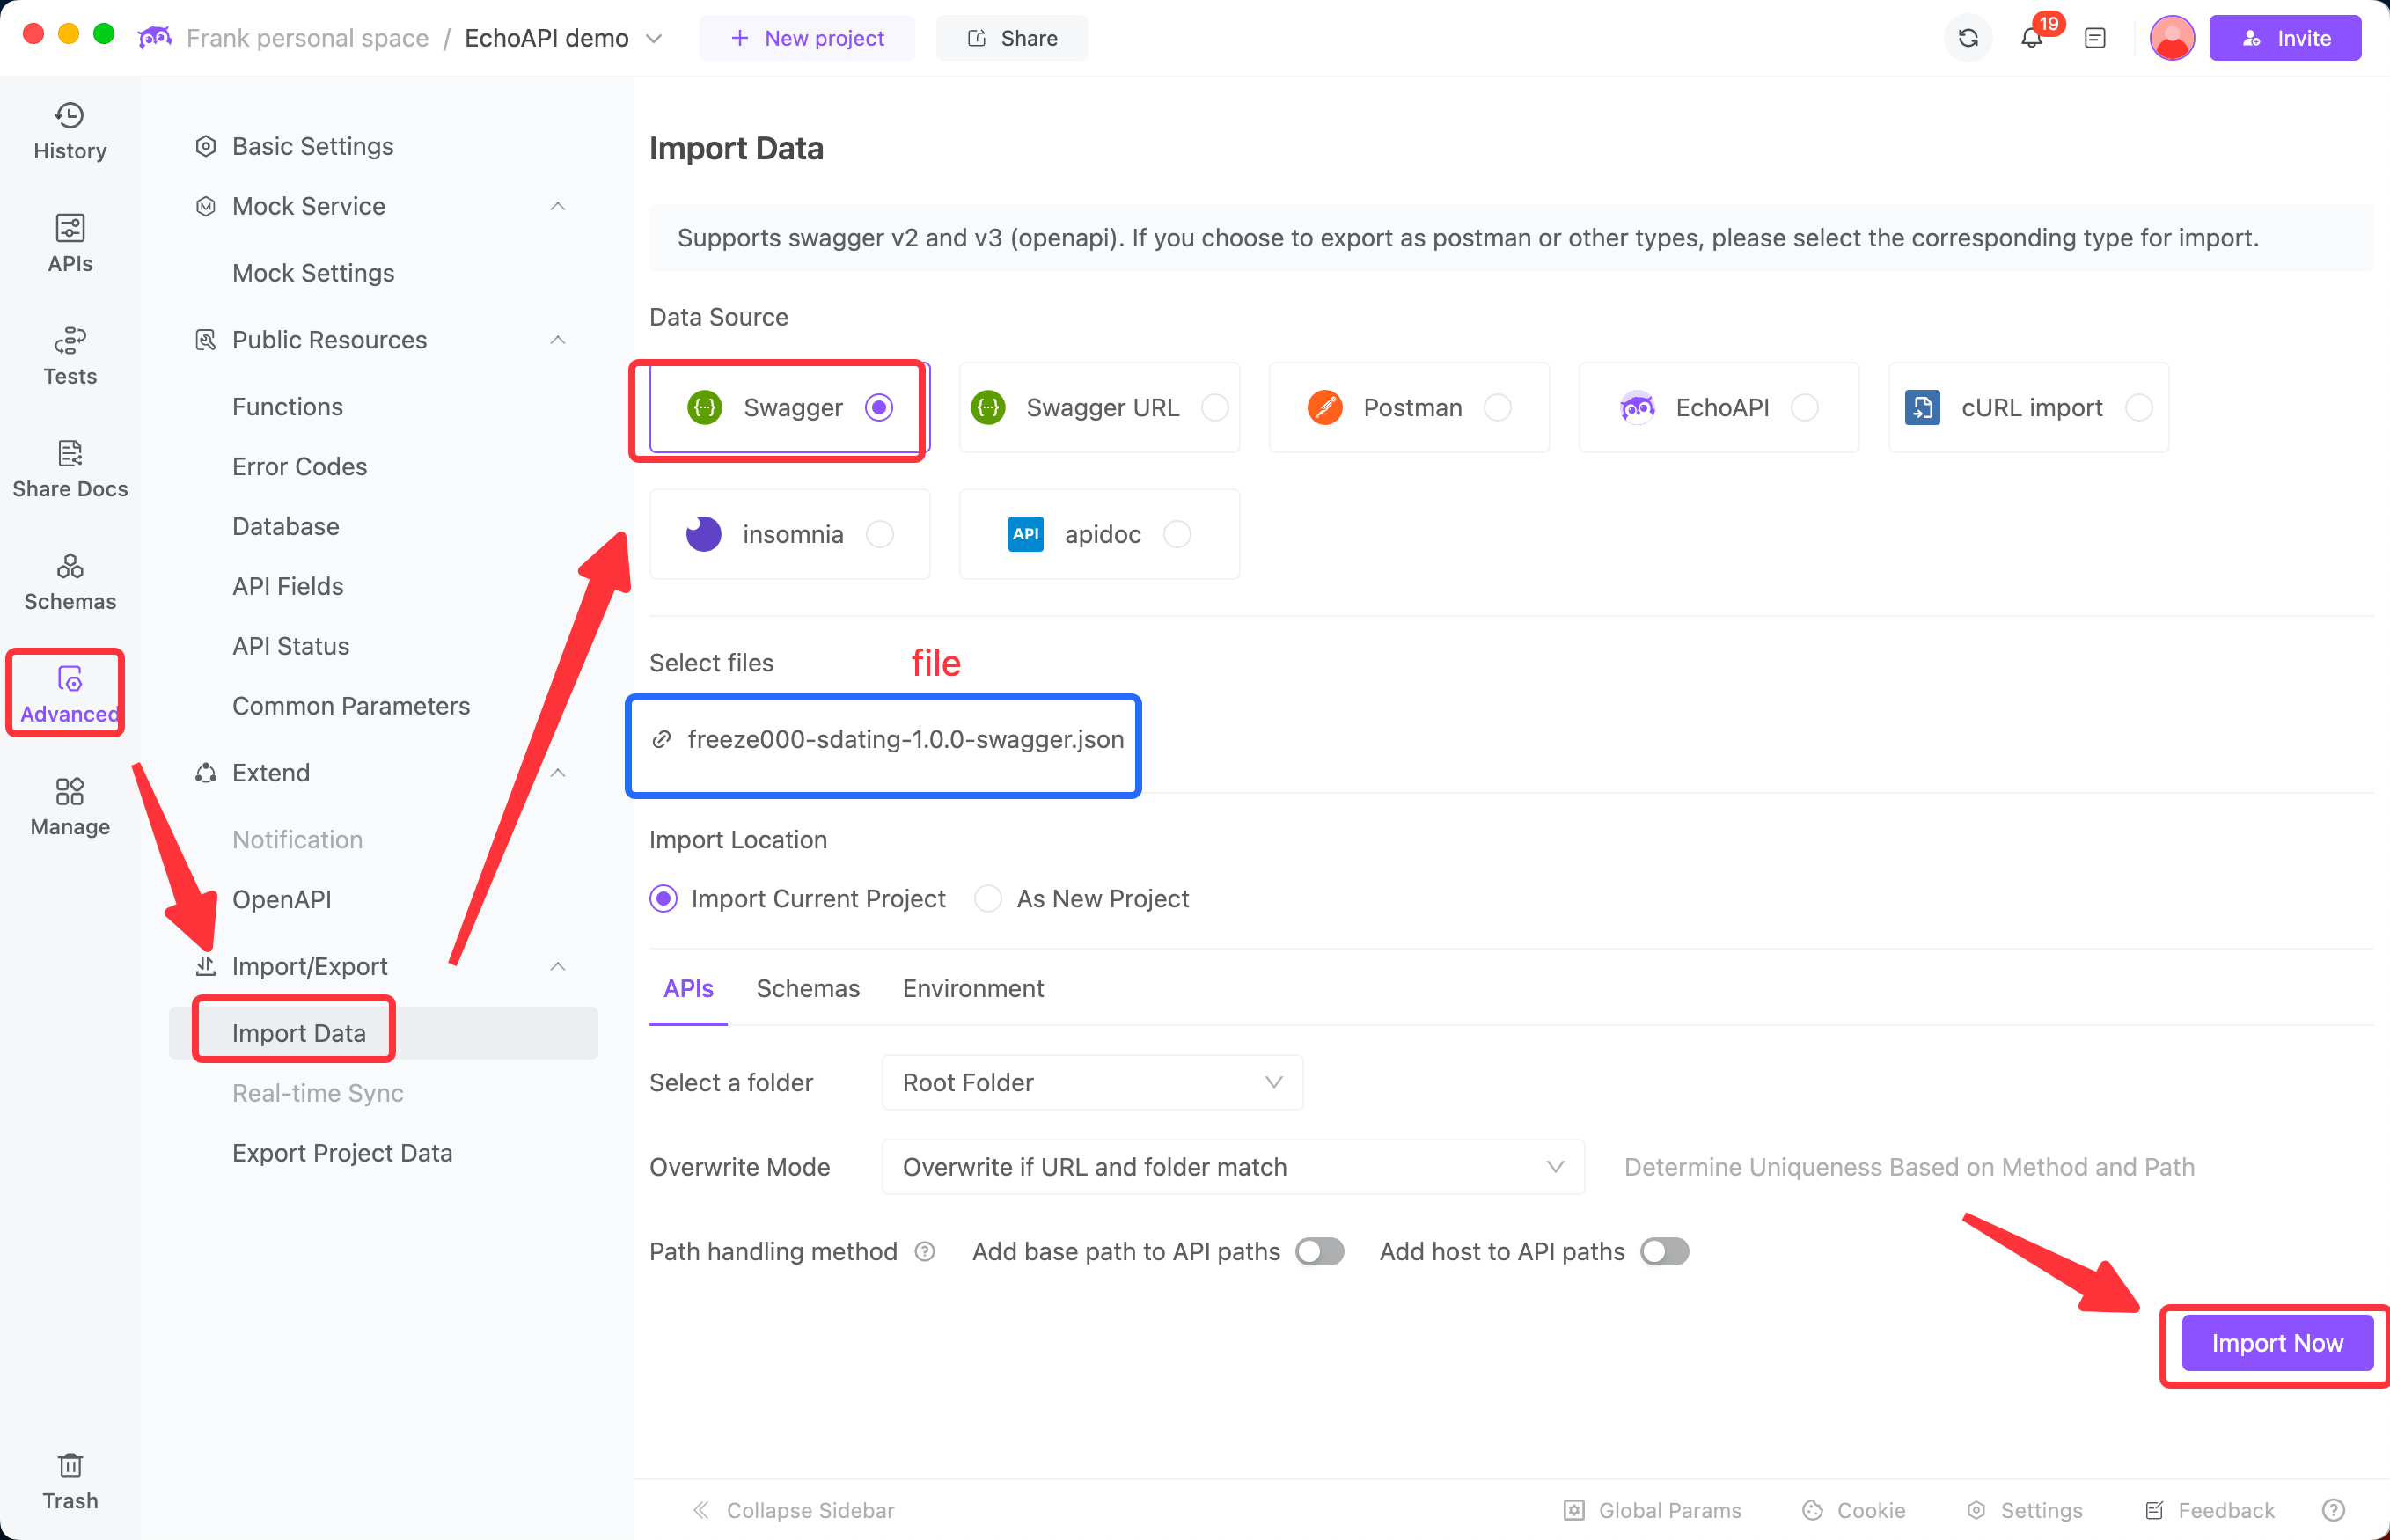
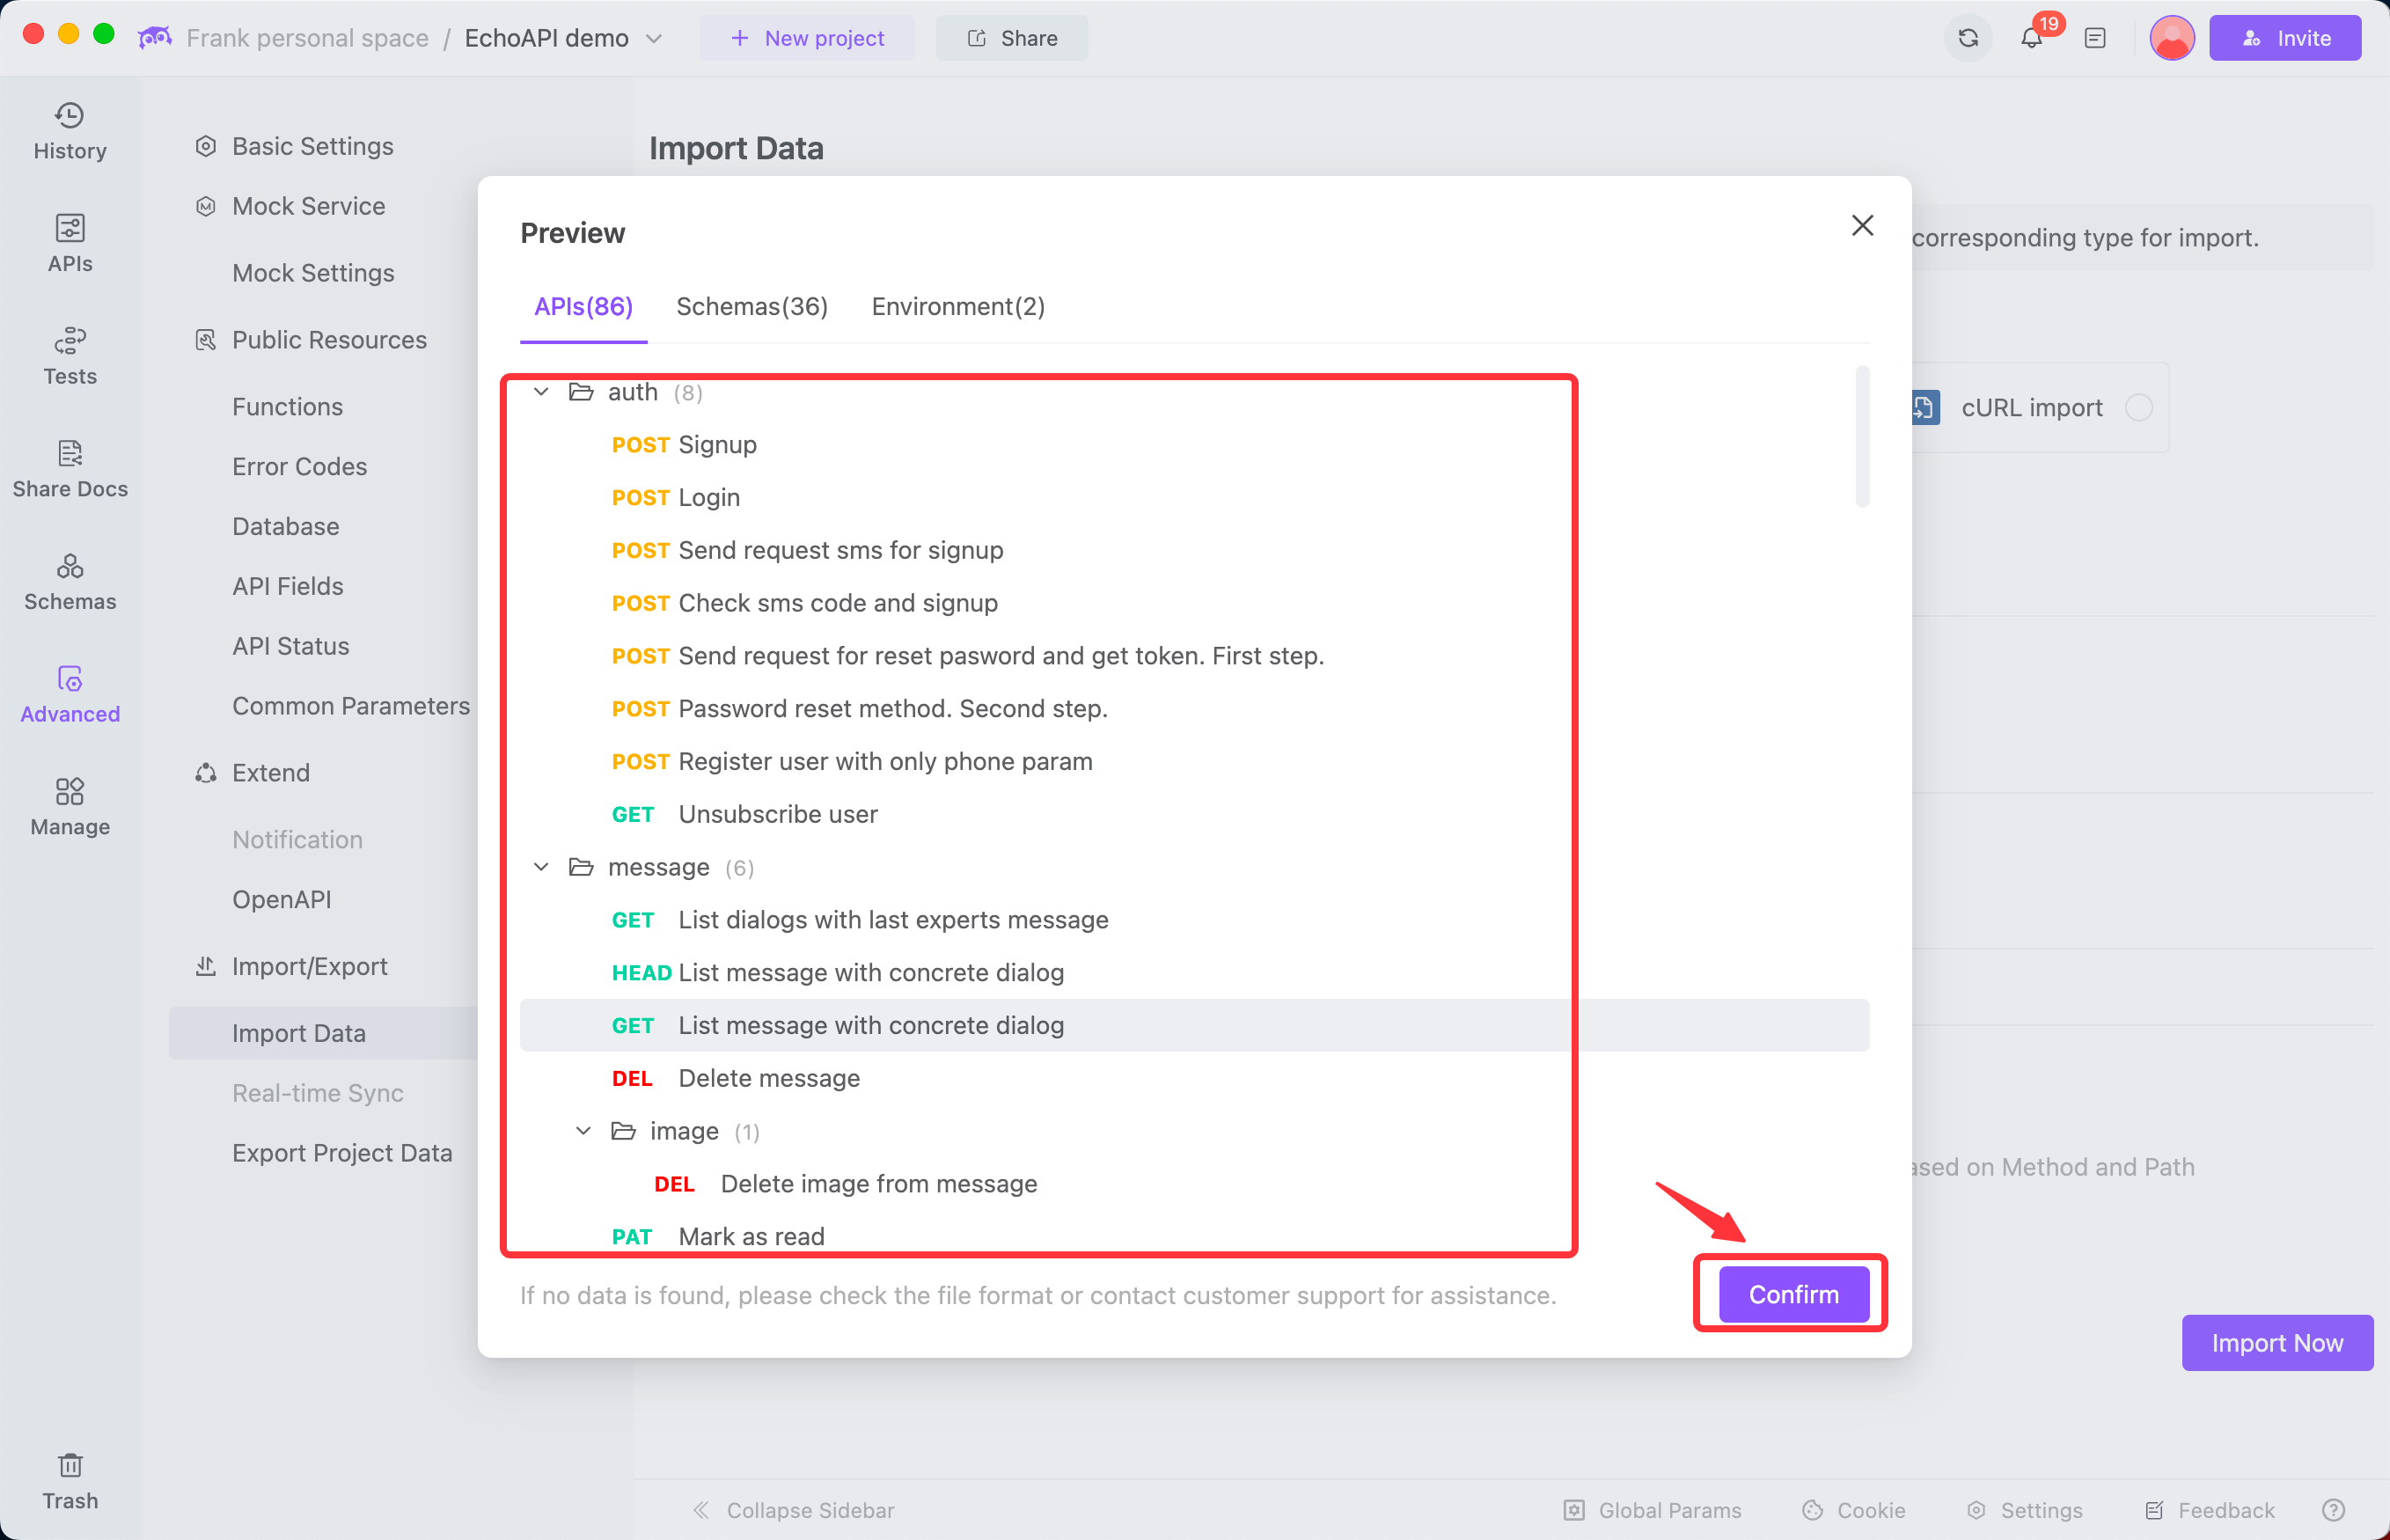
After uploading the file, EchoAPI will automatically parse and import the API documentation, and you can further edit and manage it in the preview interface.
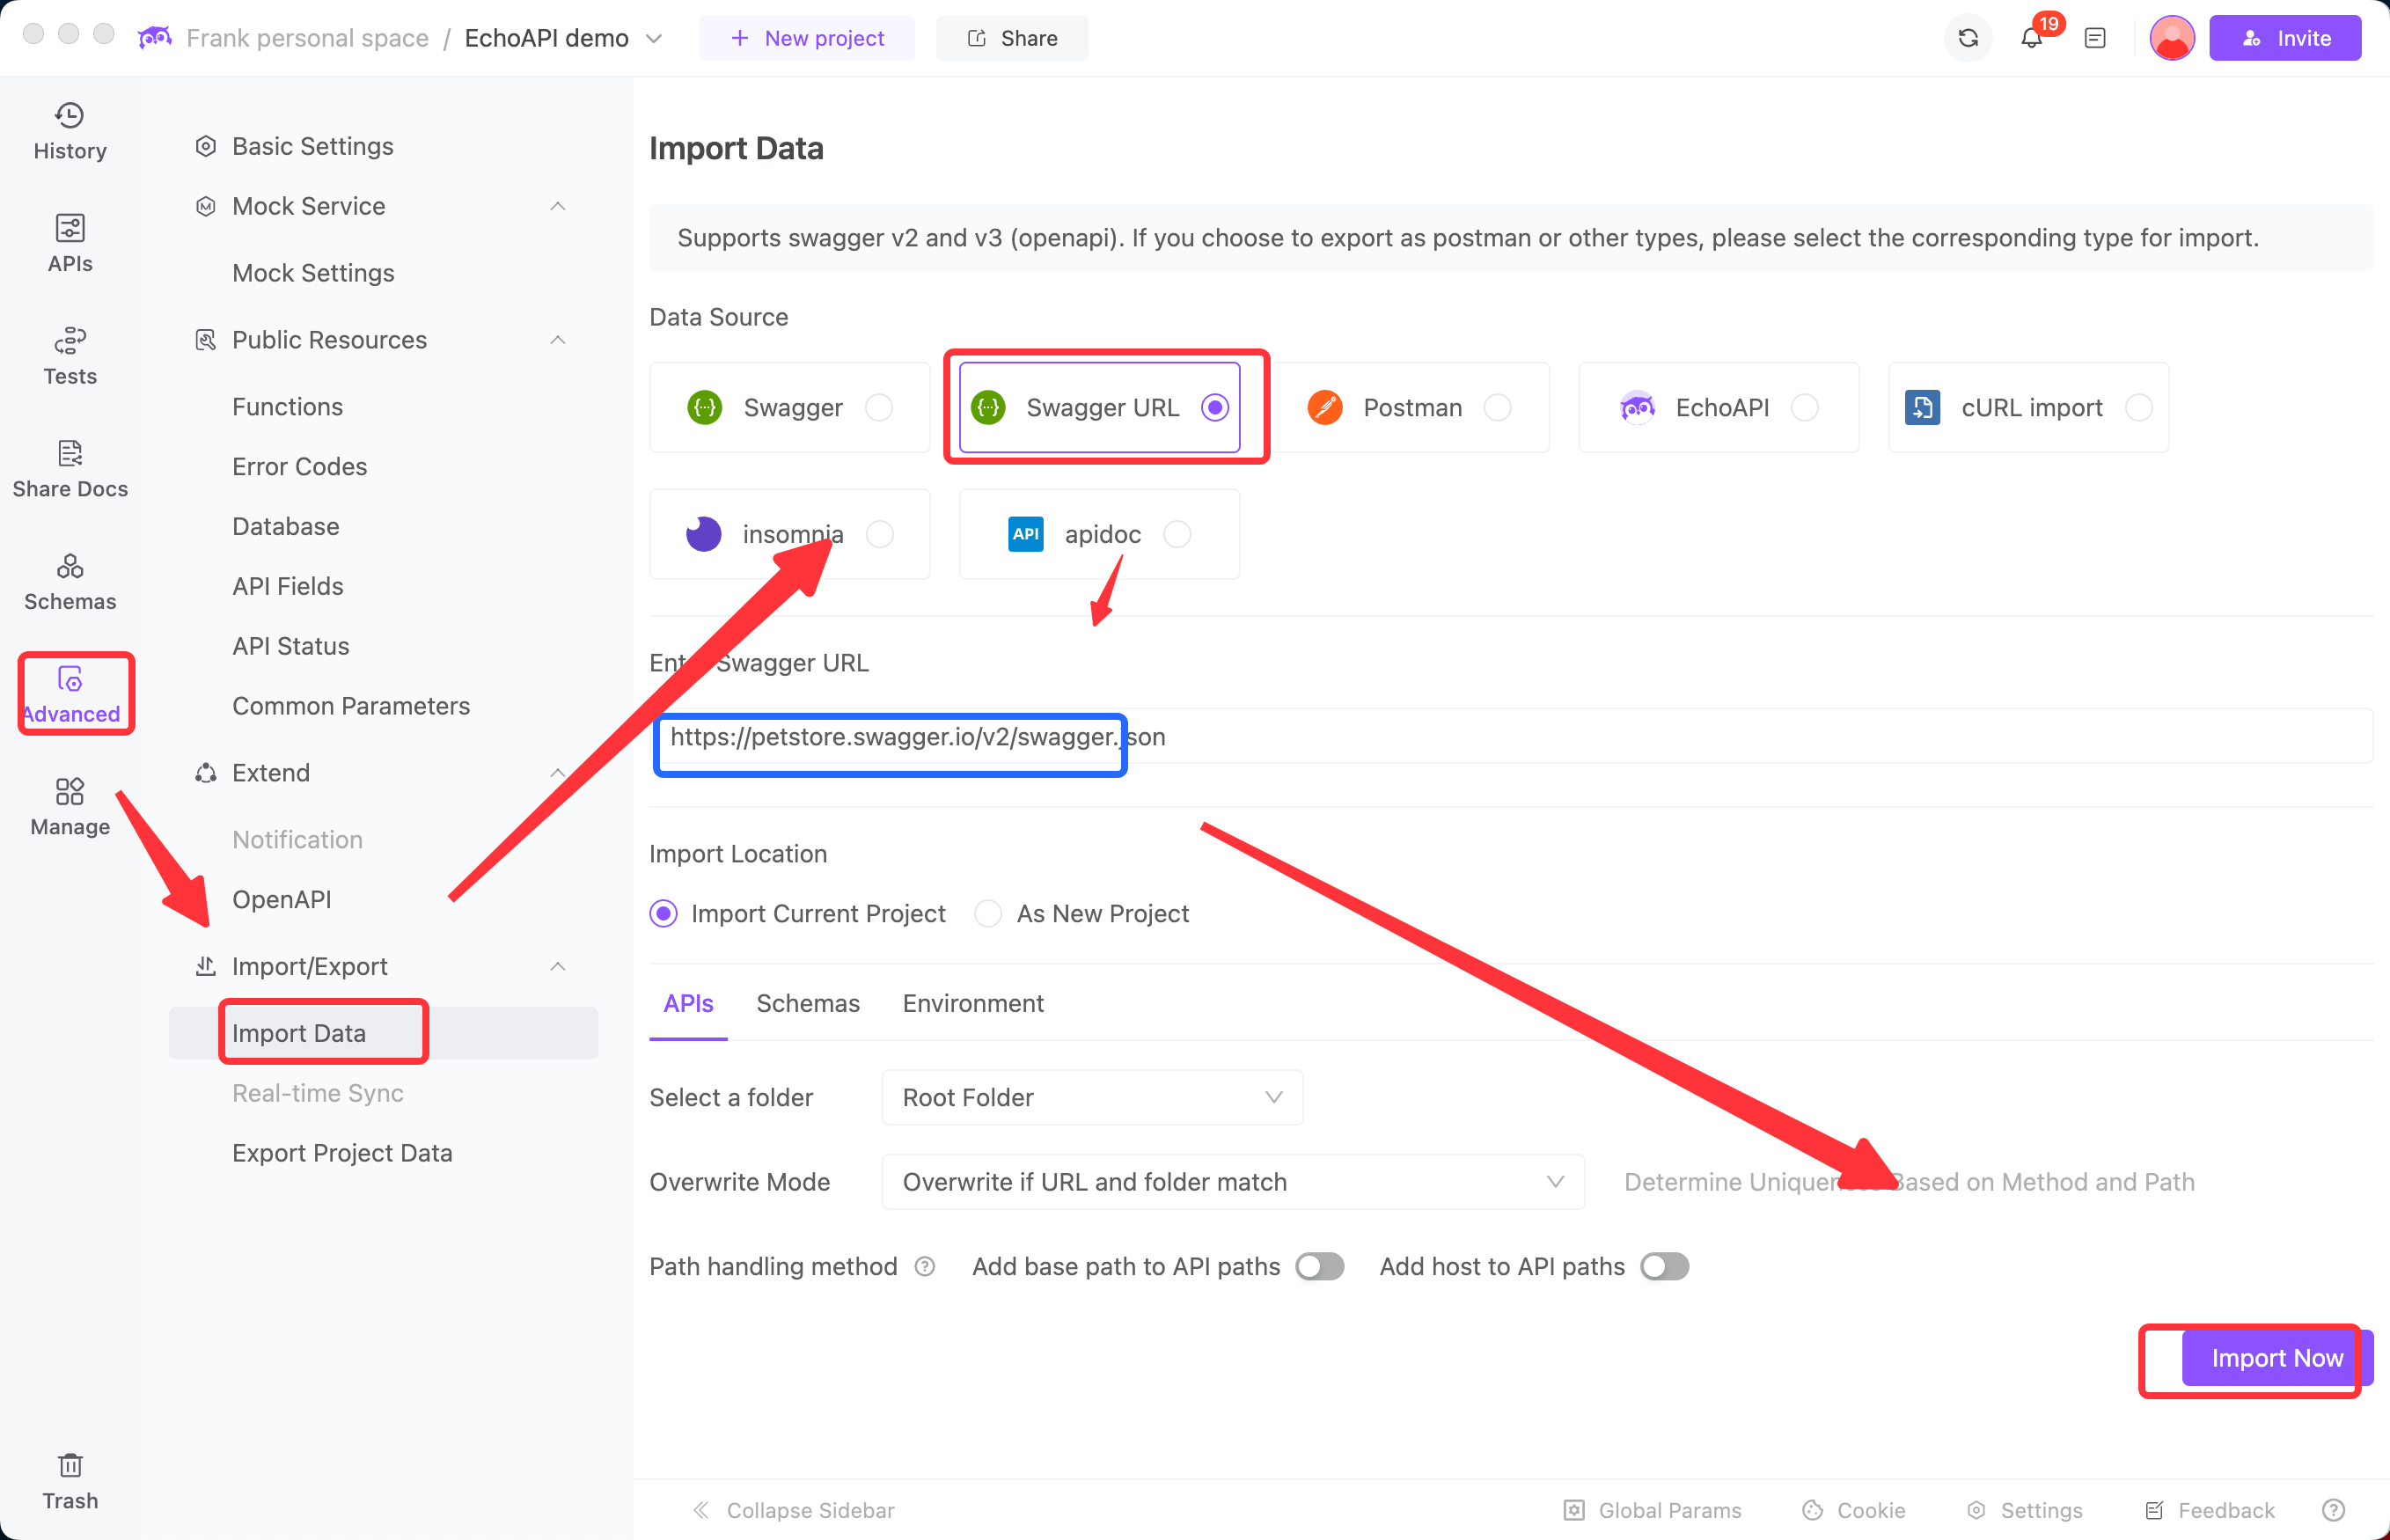
Method Two: you can also manually import it via the URL
If your Swagger API documentation is frequently updated, manual export and import can be cumbersome. At this time, you can utilize EchoAPI's online link scheduled import feature, which can synchronize the online Swagger documentation according to a set schedule. Here are the specific steps:
Obtain an Online Link
Ensure that your Swagger documentation can be accessed via a public URL. For example:Import by Online Link
In EchoAPI, enter the project that requires url import, and successively select 'Advanced -> Import Data -> Swagger URL.
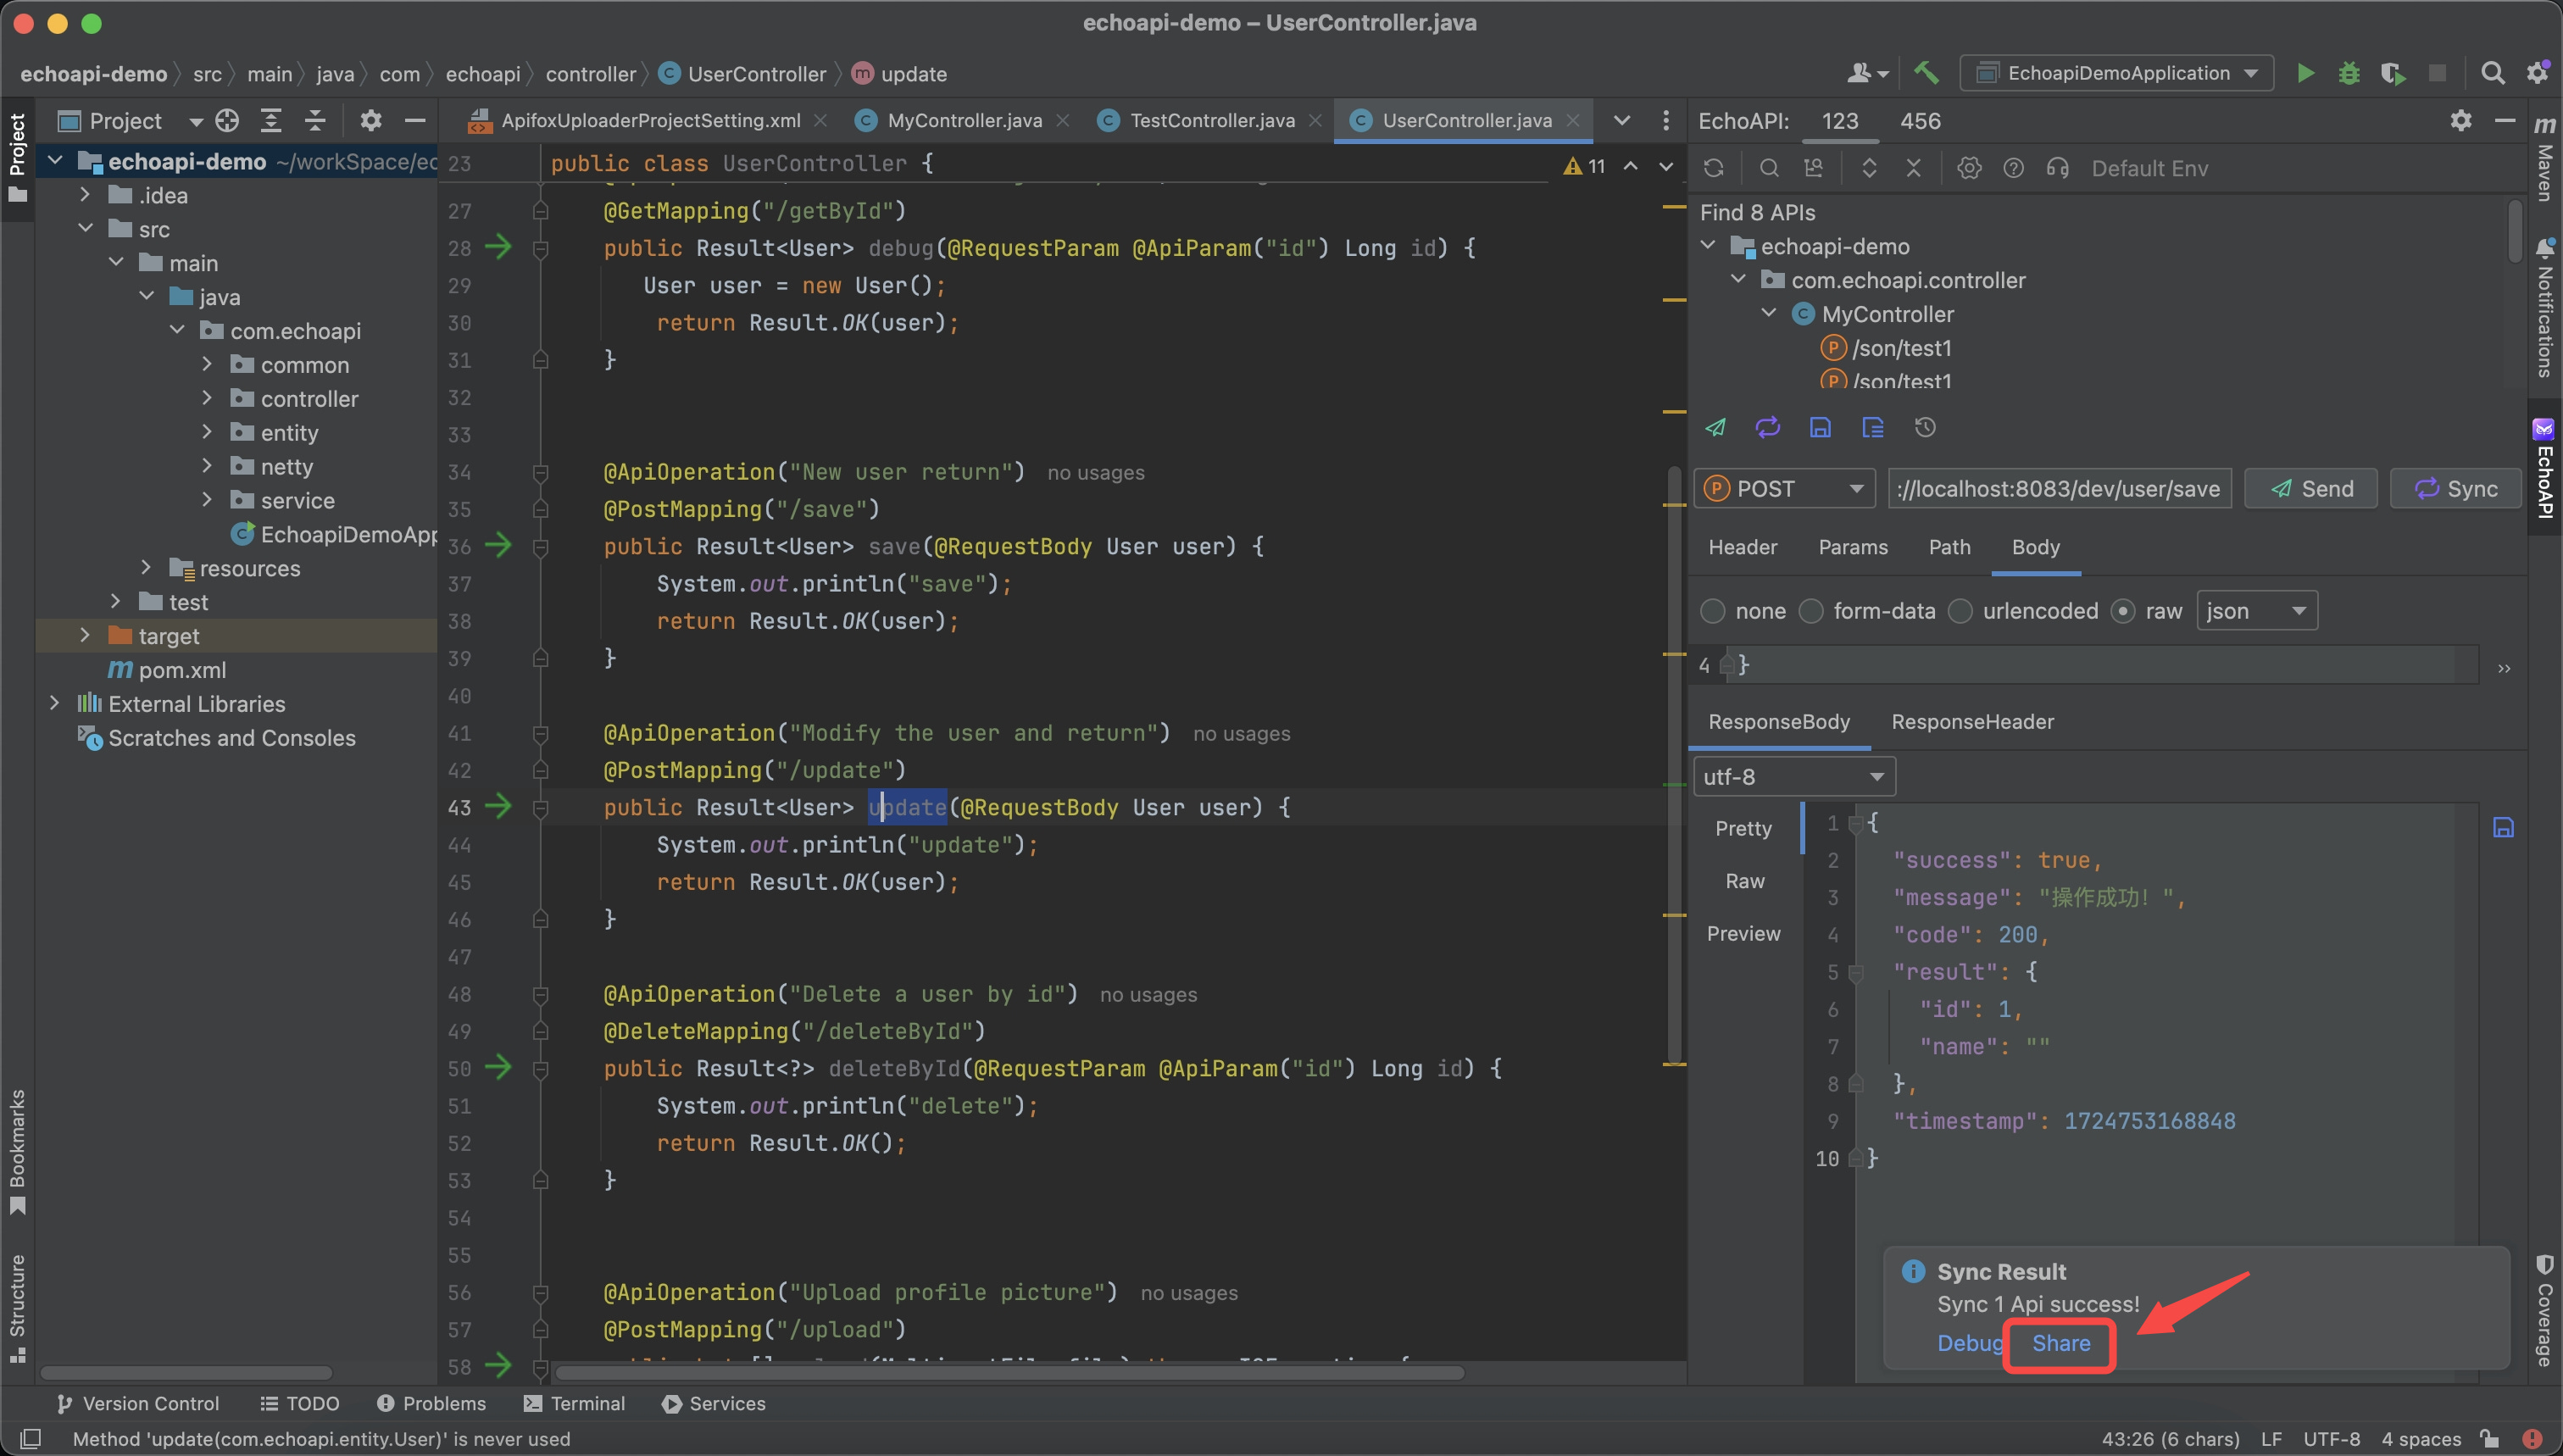
Method Two: EchoAPI for IntelliJ IDEA
If you are a developer using IntelliJ IDEA, you can download the EchoAPI for IntelliJ IDEA plugin. This plugin can generate interfaces directly from your code and instantly share them as API documentation, all without needing to install a separate client. It's incredibly lightweight and hassle-free.
sync and click share
Conclusion
In conclusion, migrating from Swagger to EchoAPI offers a streamlined approach to API documentation and development. EchoAPI addresses the common pain points associated with Swagger, such as annotation dependency and lack of permission controls, while providing a user-friendly interface and powerful features like real-time collaboration and automated code generation. By following the outlined methods for migration, developers can enhance their API development workflow and maintain up-to-date documentation with minimal effort. EchoAPI is a valuable asset for any development team looking to improve efficiency and collaboration in the API development process.